Well guys here is lesson 1 ...thanks for being patent :o))... I got a cheap camera and well what can I say ... you get what you pay for...so excuse the pictures some are a little blurry so I will do my best to explain them as we go!
So here I've traced out my pattern pieces onto some calico (muslin for you guys in the US) and I've taken some really cheap white glue and run a line over the pencil lines... smear this in so you don't have any lumps when it dries... I've done this as it stops the fraying of the material while your handling it and having seams pop open!

Next we cut out the pieces we will need which are the sides and the inner side pieces as below and sew them together only around the inside of the legs, tummy (not the back or front of the legs) using a small stitch on your sewing machine and a 1/4 seam... Use the edge of your sewing machine foot for a guide.

Sew both sides as above making sure not to sew those outer legs as yet!
Once you've done that we'll join both sides so place your 2 pieces like I have here and fold the neck and body down away from the curved line of the half body piece and pin together as I have in the next shot.

Sew along this curve... again a small stitch setting with a 1/4 seam.

Here's what we should have at this point :o))

Next we'll sew up the outer sides of the legs....just to the point of the inserts points on his rear end. The front is the same but when you sew the second leg closed you will pass the point of the insert and sew to the top of the neck opening... leave the neck open where the head will sit in that curve!

Rump insert... This is one of those places I'll hand sew ... it easier to do so for me... If you'd prefer to machine sew and are confident of doing so then you can do that... I just hate having to unpick and I find I will 99% of the time have to end up doing so ...so I hand sew LOL
Right back to the rump insert... place the fatter point of the leaf shape toward the point of the body insert and tack in place with a stitch... continue to tack this piece in place up both sides till you get to the front point... tack both sides to this point... you could use pins if you want but I like to tack with a stitches... once you have it tacked in place hand stitch together properly with a blanket stitch then a straight stitch ...yes sew it twice as extra strength is always a good thing!
Sew top of neck closed at this point too leaving the curved part at the front open!


Right the Head.... it's pretty easy ... even though some will say Gusset Yuck LOL
Take one half of the head and starting just under the chin bump at A sew the insert gusset from this point around head to B and you should finish just before where you started ...

The other side of the head is done in just the same manner only this time leave a bit open as indictaed in the next picture for turning.

Right so after all that your almost ready to turn your pieces... but before we do that just whip stitch the bottom of the hooves closed to make turning the legs just a tiny bit easier... okay turning can be tricky and the smaller your doing your horse the trickier it will be ...so have patience ... I have done this one smaller than my originals so I actually had to use a doll needle to help in turning them!!
Once turned stuff ...remember to stuff the legs firmly we do want his to stand!!...don't attach the head yet ...
Right that's all for today ... Next part will be up tomorrow...any questions email me :o))
Ok.... got camera ...its charged and ready to go... so first lessons for the Unicorn will be up today :o)))
Okay folks... run into a wee snag... I will still be doing the tutorial but it will have to be at a later date as we left our camera down in Carterton while we were visiting this last weekend... so I will have to buy a new one since Andrew's brother is into creating dvd's and ours was a video camera/photo one so Andrew said he could keep it... so hopefully will be able to afford a replacement soon! Sorry to everyone who is waiting on it and promise to get it sorted asap!
Hugs,
Sharon
Okay guys I forgot to put a date on the start of class... It will be starting Tues the 27 Oct ... I wont be starting till then as I will be away Friday through Monday... will be visiting with Sharon nz and also my partner Andrew's family... will be good :o)) so hope to see you all join in and I also want pics of what you do :o)))
Hugs,
Sharon


Well guys haven't I done well ... 3 posts in one day wahoo LOL
Just had a thought I've not really let you all know about what patterns I have for sale on my site! And also wanted to offer you guys a special of sorts so if you'd like one of my patterns ...just email me and say you saw this on my blog and you can have any of my patterns (doesn't include the Teds From Threads patterns) for half the price advertised on my site!
You can visit my site at www.houseofpugish.com


Well since I got talked into making a Unicorn from my Pegasus pattern which is free just click on the images here...download and print to your desired size.... I thought if anyone want to join me in making one I'd pop up the process piccies and instructions as I go!
Should be fun so come on and join in :o))
What you'll need....
Calico about 1/4mtr and matching thread,
Scissors and pencil,
good glue something thick,
black beads about 4mm or what ever size takes your fancy,
Strong thread for attaching beads,
Polymer clay any colour you have as you can paint them after or black to skip painting,
Wool for felting ...I use Merino ...whatever colour you like I've used Purple and looks fantastic and remember this is a mythical creature so any colour goes!!
A needle felting needle .. I like my 38gauge as it felts in wonderfully... make sure you have a few as they do break at times!!
Stuffing,
and lastly a good black pencil for highlighting!
Okay thats it so far if I've missed anything I will update!


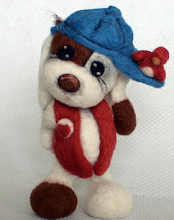
Well I thought I'd post a few bits of my past works... these guys are needle felted creatures ... I very rarely do needle felting these days. I think I just plain got bored with them... I just couldn't find anything that inspired me to work the wool again ... but since I'm going to be doing an order for one I'd show you some past works...
Subscribe to:
Posts (Atom)