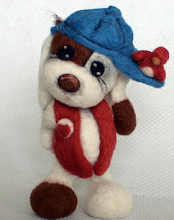
Right lets get to finishing this guy...
Firstly we are going to add the long hair over the hooves and lower legs... so take a length of the fiber your using and measuring from about the knee down to the bottom of the hoof cut that from the length of fiber... do the same for each leg ...
Next using a good tacky glue brush some on the top of one of your cut pieces..
Now wrap this around the knee area... yep this is a messy job so do your best...
Do this for each of the legs but only the front of the leg that's bent...
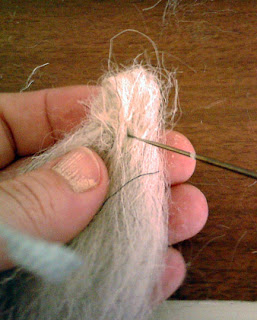
Okay that done allow to semi dry... now before it's fully dry usually about 2-3min ..start to felt the top in where the glue is ... use you needle at the same angle I have here... this will help aid in avoiding your fingers... also remember to go in straight so you don't break your needles!
Once you have done that to all 4 of the legs we'll trim them a bit... note the direction of the scissors... if you trim off the bottom then when your feathering the hair always cut down the hair using just the tip of your scissors... remember to snip little by little we dont want to take chunks out just sort of layer it a bit... now if your happy with the layering stop there... if your not happy with the layering as its a bit thick on the bottom ...that is easy to correct by taking you scissors and snipping upward to thin it out a little... idealistically I aim for just a hint of hoof being visible through the hair... but again this is up to your taste :o))
Pic of all legs trimmed...
Okay... lets get to the mane etc...
But first lets highlight some bone areas... best way to describe it to you is have a look at the pictures... I've used a black pencil quite strongly here so you could see it clearly ...but you would do yours a bit lighter ...just a hint... so follow what I've done ...
Holding your piece of fiber in one hand pull a chunk of hair from the top... you don't need to much here just a small longish bit for his fringe...
Felt this piece between the ears..
Mane now... using the techniques as above pull out a couple of lengths of fiber and spread it out as I've done here... please note you dont need a thick amount as it will be folded...
now if your making a big Unicorn then hold your fiber lengths up to your horse to see if you like the length.... if you do then choose what side you would like the mane to fall and felt the ends down on the opposite side... fold over and finish as for the folded mane...
Place this over the neck like here and felt it up the center very well...
Now play around by folding it over on each side to decide which side you like ...once you've decided which side you like hold it in place but don't pull ..you want it to be a bit puffy and not flat...have a look at the pic to see what I mean...
Next well attach it down just gently to keep it sitting on the side... note were my needle is in the next picture then just gently felt across the neck... only a few stabs with the needle as we don't want to flatten it or have a line there...
Tail... I've pulled out a length of fiber ... then I've folded the top down just a bit and stabbed the needle around to hold it in place... I did this as the top of the tail needs a bit more thickness to it...
Attach the tail by needle felting around the ball you made at the top of the tail...
Okay as you can see in the above picture his tail is just not long enough... so I pulled another piece of fiber, lifted his tail and felted it in just a bit lower down... now yes I know this isn't a pretty picture but it needed doing!
Looking much better now :o))
Right that's the horse part done... now lets turn him into something a bit more mystical :o)) ... With the length of this post I will put it up on another post ... and you wont have to wait long as I'm going to do that right now!
1 Comment:
Subscribe to:
Post Comments (Atom)


Hugs
Diana